![]() Looking to create a teaching video?
Looking to create a teaching video?
 Looking to create a teaching video?
If you wish to create a teaching video to share with your class then where do you start?
There are a number of different ways to create a teaching video.
You don’t need lots of fancy filming equipment, specialist lighting, highly scripted text, remote microphones or
a studio set! You can just use what you have available – and be yourself. If you want to be on camera, that’s fine, but if you just want your voice over the activity you are filming then that’s perfectly fine too.

You just need something to record the video (eg phone/tablet) – & your skills and experience as a teacher (and maybe something to edit what you create).
- Your choice partly depends on what you are aiming to share – what are you trying to achieve, how much information are you trying to share and in what way will you share the video with your intended audience?
- Your choice partly depends on what you want the video to look like – do you want to be on camera, do you wish to include your voice, do you want it to be a video of a PowerPoint presentation (with or without narrated voice), or do you want to make use of animated characters instead of your own image?
- Your choice also depends on what device and software/apps you have available to make the teaching videos, whether laptop/desktop, tablet/smartphone and software/apps you can access.
![]() What makes an effective video?
What makes an effective video?
 What makes an effective video?
There’s no hard and fast rule about what makes an effective teaching video. Every teacher is different and every class is different so find what works for you and your class. The age of your learners, the way you choose to share a video, whether you wish to have interactivity between shorter videos, and what you are trying to convey in the video, are all considerations to bear in mind. Being clear about what you are trying to share is the biggest consideration! Consider, instead of a long video, chunking a lot of content into perhaps a series of shorter videos each with a specific focus. And try out what you are creating on different devices to see how your learners might view the video. Is it bright enough lighting so that what you are showing is clearly seen, can the sound be clearly heard? You don’t need to make a masterpiece the first time round (or indeed at any time!) so give it a go and make changes in light of your experiences and feedback from your learners.
Camera-Ready Educators: Video As a Learning Staple – a blogpost by Paul Teske and Sarah Brown Wessling which gives food for thought for teachers looking to create a teaching video: “…teachers know it’s not the screen alone that engages students. It’s how teachers use video as part of deliberate instructional design that creates the opportunity for learning and growth. Teachers use video in various ways for various purposes, each thoughtfully constructed.” That blogpost succinctly summarises and provides points for reflection for teachers using video whether it’s for teaching new content, differentiation, scaffolding and support, or for conveying information about such things as class announcements and routines.
The experiences of others can help you make your own judgement about what will work and then you have the feedback from your own class of learners.
Latest blog: What does the research say about designing video lessons?
https://t.co/1x7dXs4ct2
Featuring some insights from Richard Mayer's Handbook on Multimedia Learning. pic.twitter.com/aXyhIVwEw6— Daisy Christodoulou (@daisychristo) April 30, 2020
Engagement with videos begins to drop after the 6-minute mark, and it falls dramatically after 9 minutes. Keep this #BestPractice in mind – chunk instruction such that each video covers a single learning objective or task, and nothing more. #PearlandEdtech #WeArePearlandISD pic.twitter.com/GXKj0Ye5VN
— PearlandETS (@PearlandETS) June 18, 2020

Video of teaching activity with your voice-over
If you are showing something you are writing – whether that’s simple phonics, handwriting formations, numeracy processes or anything else which involves writing – then you can point your phone/tablet camera at the paper or wipe-clean whiteboard, press record on the phone/tablet camera and start talking. Having your phone/tablet affixed to a tripod, a home-made stand or propped up so it won’t move is probably wise!
Keeping your video short is beneficial both for your own sake in not having to redo or edit a long video in which you wish to make a change, but also it’s helpful for sharing online somewhere to have smaller videos as they upload more quickly. If you are sharing on Twitter there is also a restriction on the length which will upload, but if sharing on your classroom digital platform you can add accompanying explanatory text, and perhaps have a sequence of short videos (each labelled with identifying text) so that pupils can more easily watch the parts as often as necessary for what they are doing.
Here’s example of videos shared by teachers where the camera is pointed at the writing area, and with the teacher voice added as narration, or using a class toy or puppet to provide the on-screen persona:
— P1 and Mrs Gall (@MrsGallAPS) May 18, 2020
La pierna
![🦵]()
El brazo![💪🏼]()
El pie![🦶]()
La mano![🖐]()
We are practising the parts of the body this week.
1. Practise the words
2. Draw a real or made up person with lots of detail if you can.
3. Label the parts on them in Spanish.
4. Keep your drawing safe, you’ll need it again. pic.twitter.com/ur3Rf1Dvbf— Carronshore P3 & P4/3 (@CPSP3_4) May 18, 2020


Blair Minchin has shared many imaginative teaching videos at @Mr_Minchn and @LittleLessons20 –
Atmospheric Pressure
Plastic straws are hard to come by these days I know but if you have a bending piece of tubing this is some pretty advanced physics. Can still do the first part with a non-bendy straw.
Equipment: two glasses, straw
Time: 30 mins#homeschooling #homeschool pic.twitter.com/C61lOztnOm— LittleLessons (@littlelessons20) May 19, 2020
Speech Marks
Now, this is actually week 2 of Creative Writing but also a great stand alone activity to develop your use of speech marks.
Time: 30 mins
Equipment: Pencil, Paper, Jokes#remotelearning #Homeschool #homelearning pic.twitter.com/PfNmyrc3fa— LittleLessons (@littlelessons20) April 27, 2020

Taking video with your mobile device
The likelihood is that the device you have to hand for taking videos is your smartphone or mobile tablet, a device such as an iPad. And that’s perfectly fine for taking video to share with your learners.
If you want to find out about some of the inbuilt camera features as part of the camera app on an iPad then click on this link for a blogpost about time-lapse, slo-mo, burst-mode, and more on a smartphone or tablet
10 Tips for Recording Better Video with Your Smartphone – a helpful blogpost by Maggie Tillman and Elyse Betters with tips for making better video with your smartphone.
Screen Recording on iPad
Whatever app you are running on an iPad then you can create a teaching video where you record whatever is on the iPad screen, where you can if you wish, add your voice-over to explain what your learners are seeing.
Here's how to make a screen recording on an iPad or iPhone—handy for recording video tutorials. #remoteteaching #distancelearning pic.twitter.com/upCj33AYhb
— Tony Vincent (@tonyvincent) April 27, 2020
 Here's how to make a screen recording on an iPad or iPhone—handy for recording video tutorials.
 Do you want to appear on camera beside your screen recording on an iPad? Then here’s how you can use split screen to record yourself on the iPad camera while recording activity on the iPad
Want a video of yourself teaching alongside your lesson visuals? Use Split View alongside Screen Recording on an iPad. Quick and easy way to create lessons with a more personalised touch – pupils see you as well as your content. Give it a try and let me know how you get on! pic.twitter.com/6KejVHX2B0
— BlendEd_NI (@BlendEd_NI) May 31, 2020
Screen recording on a Windows desktop PC/laptop
If you have the latest version of PowerPoint then you have the facility to capture a video recording of whatever is on your PC/laptop – whether that’s the PowerPoint presentation or indeed anything on the PC which you wish to show to include in the video.
NEW! I've created a new "Video and Screen Recording Tools"
YouTube playlist chock full of quick tip videos
More coming in the near future…
https://t.co/Zi0SniQVxc#FlipgridForAll #MIEExpert #MicrosoftEDU pic.twitter.com/1SydBydssn
— Mike Tholfsen (@mtholfsen) May 7, 2020
 YouTube playlist chock full of quick tip videos
Click the link to access helpful visuals that guide you through the steps for recording Slide Shows in PowerPoint. https://t.co/eLemmunfhv #MIEExpert #Microsoft #MSEdu #Education #Digitallearningtools #AssistiveTechnology #PowerPoint #ScreenRecording pic.twitter.com/bkci1CEZIJ
— Rebecca Chapman (@MsBeccaChapman) May 19, 2020
There are a number of other tools for Screen Recording, whether downloadable software or online. Click on this link for some more options including Screencast-o-matic and Smart Recorder

Turn your PowerPoint into a Video
PowerPoint has the option to create a video from your presentation. Just open the PowerPoint presentation and go to File > Export > Save as Video. This will incorporate all that you’ve included in timings, narration, animations, media, and transitions.
Learn how to turn your presentation into a video:https://t.co/3WOkcl7bRE
— PowerPoint (@powerpoint) April 24, 2020

Greenscreen
If you wish to include yourself (or something else) in a video where the background is of something else, the subject of your video, then using the greenscreen facility available with some tools can let you, for instance, appear talking in front of a video of whatever you are teaching about.
I’m trying out different methods such as using green screens for teaching and learning when we are not able to teach as normal in classrooms. Here is part of a video I have created which will hopefully keep the Higher pupils more engaged with learning
@HwbSt @StMungosFalkirk pic.twitter.com/sd3blAq1uM
— Mr Swan (@mrswan82) May 18, 2020

Click on this link for a blogpost with a guide to using DoInk green screen iPad app to create videos using a greenscreen. This blogpost also includes lots of examples.
Click on this link for a guide to using the iMovie iPad app to achieve the greenscreen effect
The online tool unscreen.com provides the means to remove the background automatically from a video so that you can combine with another image or video and quickly create a greenscreen effect, without the need for any other equipment.
Thank you to @ICTEvangelist for sharing about https://t.co/NRpiD0V2wc for quickly removing backgrounds from videos without the need for a #greenscreen
#DigiLearnScot pic.twitter.com/aeoYgq4Ktp
—
Malcolm Wilson
(@claganach) March 6, 2020

 Malcolm Wilson
  (@claganach)
 ![]() Stop-motion sequence of still images
Stop-motion sequence of still images
 Stop-motion sequence of still images
Stop-motion animation videos can be useful to illustrate a teaching point where you have a series of still images. This can be useful where live action of a sequence of events is difficult to capture on video, or may take too long, or where you only have access to still images. You can create a sequence of still images using presentation software like PowerPoint (and export as a video to create the illusion of animation/movement) or drop them into video editing software/app such as iMovie on an iPad. Or you can use stop-motion software/app such as the iPad app Stikbot.
How did you get on with the maths task yesterday? Can you measure a short distance and try to work out the speed of a toy car or paper aeroplane, time how long it takes to travel that distance and calculate the speed. Here’s an example my kids helped me make
#antomaths pic.twitter.com/w5T4AT0c61
— P6AF Mrs Aitken (@MrsAitkenAnto) May 6, 2020

Stikbot iPad app
Click on this link for a blogpost about making a stop-motion animation using the Stikbot iPad app
Create an animation from presentation software
There is a host of tools which can be used to create animations:
- Magic Move with iPad Keynote App
- PowerPoint
Virtual Classroom
loving my wee virtual classroom videos for S2 practical this week. Sharing the link to their assignment in Teams via @Flipgrid #TeamMIEEScotland https://t.co/2MmQni9EhX
— Sarah Clark (@Sfm36) June 10, 2020
![]() Editing your teaching video
Editing your teaching video
 Editing your teaching video
There’s a host of video editing tools available. Chance are the device you have available has likely got something already there ready for you to use.
For Windows laptops/PCs then built into Windows 10 devices you will find Video editor (which replaced Windows Movie Maker, with which many teacher may already be familiar, from previous versions of Windows).
Did you know that there is a free video editing tool
built right into Windows 10? Click the start button and type "Video Editor"
Great for creativity during #remotelearning. Think of it as "NextGen Movie Maker"
YouTube
https://t.co/2mAI7h39bX#edtech #MicrosoftEDU pic.twitter.com/nlco2bhgDE
— Mike Tholfsen (@mtholfsen) May 17, 2020

For iPads then available for free on iOS devices you will find iMovie and Apple Clips.
 Creating and editing a film in the classroom with an iPad can be done with the iMovie app. Click on this link for a post about using iMovie on your iPad in the classroom (including examples) for help on getting started as well as tips on using some of the neat features such as adding video-in-video or picture in picture and more.
 Apple Clips is a neat free video-creation app for iPad or iPhone. It lets you quickly combine text, music, graphics, recorded voice, images, and animations to create videos with ease. So if you are trying to find a way to explain a topic or a teaching point then you might find Apple Clips a handy way to create a visually engaging video. The inclusion of inbuilt graphics such as arrows, finger pointers and many more adaptable images make this really easy to highlight parts of photographs or video clips with explanatory text or spoken voice.
![]() Sharing your video
Sharing your video
 Sharing your video
You have many choices when deciding how to share you video. What platforms you have available to you for your school may determine the choice you make.
The following are just some of the ways you might share your video creations:
- Using a school YouTube account – this option will let you share the link to the video in different places as well as provide an option to embed elsewhere such as a website or Sway. Depending on who you want to be able to access the video you can choose to have the video “unlisted” – that means only those who have the link can access it. It won’t be searchable and won’t appear on the list of videos on the YouTube channel.
- Upload to your Microsoft OneDrive (available to all Glow users) and at the share option choose either to make it “share with anyone” (which means anyone with the link will be able to access and will not require to log into anything – and you can optionally choose to set a password and decide to block download) or you can choose “only my organisation” (which for Glow users means in order to access the link the viewer would require to log into Glow) – ensuring the share link is set to view-only, not edit.
- Upload to Microsoft Sway (add a media card in a Sway and choose the video option and you can upload the video) – at the share option in your Sway you can choose to have it available to be viewed by anyone with the link, or only the organisation (Glow) and optionally add password if you wish. Having your video added to a Sway means you then also have the option to add text about the video and to add pictures related to it.
- Upload to files in Microsoft Teams for your class or group – sometimes uploading larger files can be faster if you go to Files in your class in Microsoft Teams and then at the top right choose “Open in Sharepoint” then navigate to the folder “Class materials” which is read-only so that your class can view but not inadvertently remove the file.
![]() Online Courses for Creating Teaching Videos
Online Courses for Creating Teaching Videos
 Online Courses for Creating Teaching Videos
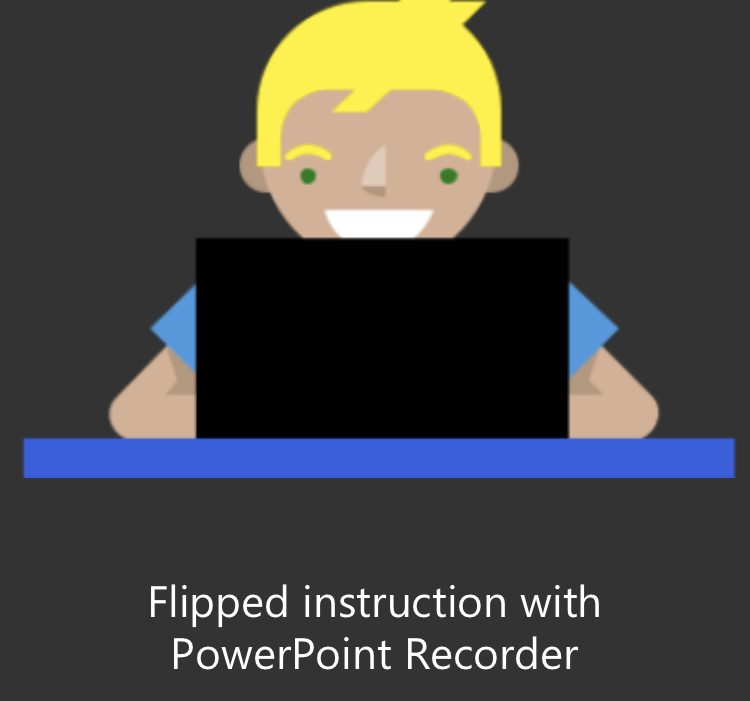
Click on this link for a free online course on the Microsoft Educator Centre – this free online course provides step by step guidance for how to create a teaching video and also has tips and advice about what to consider when you are making and sharing these with your class.